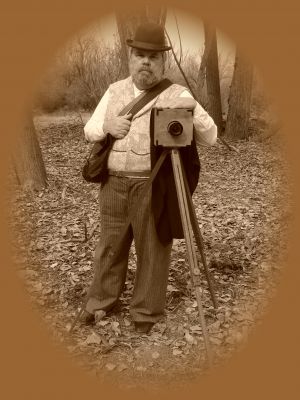
For me, ‘Easy’ does not equate to ‘Fun’ – that’s been a constant theme in my life, especially in my hobbies. I’m a long-suffering Volkswagen owner; I ‘play’ with European trains; I (attempt to) reenact the US-Mexican War period (when I’m not photographing CW battles). Compared to my choices, Toyotas, the Atchison, Topeka, and Santa Fe, and the Civil War, are easy!
While developing my photographer persona, I surmised (rightly, I believe) that the average mid-Nineteenth-Century frontier photog would likely avail himself of some form of personal protection when out in the field. For the sake of economy, why not put my Mexican War era .36 cal. Colt Paterson to double duty? I only needed to find a holster.
But there’s the rub! With the larger and later Colts being immensely more popular, finding a ready made, civilian holster for the Paterson is an exercise in futility – never mind that I’m also a lefty. So, rather than paying for custom work, I decided to try my luck at leathercraft.
I wanted a cross-draw rig that could be worn unobtrusively under a coat yet wouldn’t give the impression that I was some kind of gun slinging polecat. I read a few how-to articles on wet-forming leather and gathered some holster patterns. I then made a full size pattern out of one-eighth inch thick plastic padding sheets by wrapping the sheet around the gun and stapling along the weapon’s perimeter.
I then cut the pattern close to the staples, removed them, and laid the pattern out flat. Following a design for a cowboy action cross-draw holster, I worked out the position of the holster’s two ‘ears’ that would later be stitched to the belts that anchor the holster in place on my right flank. To complete the plan, I transferred the shape to a piece of butcher paper, cleaned up the lines, and cut it out.
With paper pattern in hand, I visited the local Tandy Leather concessionaire to peruse the scrap bins in search of a suitable piece of tanned leather for the holster. Once that was found, I laid hands on a couple of tanned belt blanks to match the scrap, and gathered a couple of bridle buckles and a few other pieces of hardware needed to complete the task.
Returning home, I cut the holster out and briefly immersed it in the kitchen sink. I covered the pistol in plastic kitchen wrap, wrapped it with the leather (clamped along the seam with large vinyl covered spring clamps), and left it to dry overnight.
 Next morning, I removed the pistol and marked the leather for stitching. I had previously purchased a sewing awl at Harbor Freight (cat. #91812) and it proved to be the perfect tool. Rather than attempt to muscle the needle through the leather, I used a 1/16” drill bit in a portable drill to bore sewing holes ¼” apart. To keep everything on track and aligned, it seemed prudent to drill only five or six holes at a time, then stitch.
It’s important to consider the order of work carefully. I almost flubbed up by stitching the holster closed before stitching one of the belt mounts that attached to the back. To complete the ‘mechanicals,’ I crafted a leather plug to close the barrel end off to dirt and crud and stitched it in place, then installed the buckles and punched the buckling holes. Though the shoulder strap has a buckle adjustment, I added a bit of craftsmanship punching a set of adjustment holes where it meets the holster and stylishly tying the two pieces together with a length of rawhide lace.
I completed the work by applying two coats of matte acrylic leather sealer. To help protect my clothing from dye leaching out of the leather, I lined the back side of the shoulder strap with white felt, gluing it in place with contact cement. This didn’t entirely prevent staining and I suspect that I will have to go back and stitch the felt in place, too; I always seem to have bad luck with glue!
